 |
www.riscos.com Technical Support: |
PhotoView is a PhotoCD sample application which allows you to access the images on a PhotoCD disc. It is not supplied on all machines.
Using PhotoView to view and manipulate an image you can
| PhotoView is in the Utilities directory on your hard disc or network. To start the application, double-click on the !PhotoView icon. The application icon will appear on the icon bar. |
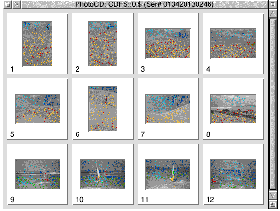
A contact sheet is a PhotoCD directory display which contains a number of thumbnail images. A thumbnail is a small representation of an image; there is one thumbnail for each image stored on the PhotoCD disc. Thumbnails are numbered in order corresponding to the number of the stored image on the PhotoCD.
 |
To open a contact sheet, click on the PhotoView icon on the icon bar. Alternatively, if you have more than one PhotoCD available, press Menu over the PhotoView icon bar icon, and choose the directory you want from the Source submenu. |
The contact sheet for the selected PhotoCD is opened on the desktop:


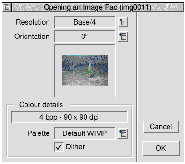
You use the control window to choose image display settings prior to displaying the image itself.
You can control
The control window also displays the colour details (the colour depth in bpp, and the display resolution in dpi) of the current display mode.
Note that you cannot alter the current display mode within the control window.
It is a good idea to work with a low resolution image in the desktop, and then export at a higher resolution if required. The higher the resolution of an image, the larger the size of that image, and the longer it takes to load and manipulate.
To change the resolution at which the image will be displayed:
By default, orientation is set to 0 degrees for a landscape image, and 90 degrees or degrees for a portrait image. To change the orientation at which the image will be displayed, click on the menu icon to the right of the box containing the current orientation setting. The list of orientations displayed includes four options with which you can flip the image in the vertical plane prior to rotation. Choose the new orientation from this list.
By default, the palette used to generate the image is the default WIMP palette for the current display mode. To change the palette, click on the menu icon to the right of the box containing the current palette details, and choose another palette from the list displayed.
By default, dithering during image generation is enabled. If you wish to change this setting, simply click on the button displaying the current setting. The legend on this button will toggle between a tick and a cross to indicate whether dithering is enabled or disabled.
To display an image;
Once you have displayed the image, further options become available via the Image menu. To display the Image menu, click Menu anywhere within the displayed image window.
The menu has the following options:
It's worth bearing in mind that these images can use up an awful lot of storage space on your hard disc. If you're going to store PhotoView images, consider converting them to JPEG format using ChangeFSI. See the the relevant section in the chapter chapter ChangeFSI.
To quit PhotoView, press Menu over the PhotoView icon on the icon, bar and choose Quit.
You may encounter loading and display difficulties if you do not have enough free memory for the display. You need, for example, a colour card with 24MB of free memory to display an image at 16 base (the highest resolution) and 24-bit colour.
Warning messages are displayed when insufficient memory is available, and PhotoView will adjust the screen display accordingly:
If you are warned that you are short of memory, it's best to quit PhotoView and then quit further running applications in order to free up more memory, before restarting PhotoView.
You may sometimes find that the contact sheet for your Photo CD is displayed, but when you try to display a picture in more detail you get an error from PhotoView 'Cannot allocate needed memory'.
To view an image from a PhotoCD in such circumstances, convert it to a JPEG image, then view or print the JPEG using !Draw.
To do this, first double-click on !PhotoView to load it, then quit !PhotoView - this leaves the PhotoCD module loaded. Next load ChangeFSI, and set it to JPEG Output, Colour. Open a directory display for your inserted PhotoCD, and drag the file corresponding to the image you want to see from the directory $.PHOTO_CD.IMAGES to ChangeFSI. Next save the JPEG image from ChangeFSI to your disc, quit ChangeFSI, and load Draw. To view the image in 32 thousand colours, switch to such a screen mode, then drag the JPEG file from disc to the Draw icon bar icon. The Draw document created may need switching to Misc/Paper limits/Landscape to see the whole image.